Tonic
Overview
You want the power and convenience of instant messaging, but don't need or want the clients to talk to the outside world. Be it a bunch of friends having a LAN party, or a large corporation - instant messaging makes working together easy. Unfortunately, existing instant messengers allow users to communicate with the entire planet, not just your local network.
Tonic changes this. With Tonic, you get all of the convenience, versatility and power of instant messaging, with none of the interference. Ideal for the smallest home network to the largest corporation.
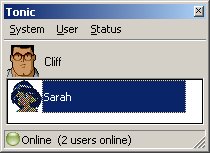
Tonic features the ability to have icons that can represent your feeling, mood, or character. You can use any of the hundreds of included icons or create your own, which will be automatically sent to other users on the network.
FAQ
Which port does Tonic use
Tonic uses UDP port 3878 and TCP port 3978.
Known Issues
Icons show up black in the message window
This is a bug/problem with Internet Explorer, not rendering an icon correctly. To get your icon to work, use an existing icon and paste your new icon into it (which should keep the same color pallette), and then save your new icon. Internet Explorer seems to choose whatever Icon image size it wants, when displaying an icon file. So if you get a 16x16 icon in the Message Window it means that Internet Explorer has chosen to use it, this is unfortuantely out of our control. *Note: This has been fixed for builds >= 846, as we have dropped the .ico file format, and used .gif instead.
Tonic is using all of my system resources and crashes on Windows 98
This problem has been found to be the default 16 colour driver that comes with windows 98. We have been able to reproduce this on a machine that didn't have the correct up to date drivers installed. To fix, install the latest drivers for your video card, and use 16bit or 32bit colours.
Documentation
What is Tonic?
Tonic is a LAN only Chat client. It operates in a Peer to Peer mode so that no servers are needed.

When you first run Tonic, you will be presented with the main window. Tonic will automatically scan your Local Area Network (LAN) for other users who are also using Tonic.
The main Window consists of the Menu System (1), your Icon (2), your Contact List (3) and the Status Bar(4).
Menu System: See "The Menu System" for more information.
Your Icon: Your Icon can be changed under System>Preferences.
Your Contact List: See "Sending & Receiving Messages"
Status Bar: This reflects the option selected in the status menu. See "Status" under "The Toolbar".
Getting Started

Upon starting Tonic, it is recommended that you set your Name and Icon, so that people can recognise you. This can be done by clicking 'System', and then choosing 'Preferences'.
Using the Icons you can give yourself some character. It might be your favourite cartoon character or your current mood for the day. The choice is up to you.
Tonic allows the ability to make your own icons and share them with the rest of the network. By creating a windows icon file, and dropping it in the Images directory, you are able to choose the new icon from the Tonic Image Preferences window. It will then be sent to the rest of the users on your network.

You can change your Name by clicking the 'Personal' tab.
Your Icon can be changed by clicking the 'Image' tab.
More information on the Preferences section can be found under 'The Toolbar' in the 'System' help entry.

Icons are displayed in a visual list, with a scrollbar that allows you to search through the extensive collection of icons
You can either select the icon by appearance or by its filename in the drop down box that is available.
Send and Receive Messages
The easiest way to send a message is to double-click the person's name/icon on your contact list. A message session window will open where you can type your message. Once you are satisfied with the message, click Send.
When you are sent messages, they will appear on your screen in the window you sent them in. If you have closed the window, then an icon will flash in your System Tray indicating that you have a new message. To view the message single click the flashing icon in the System Tray.
The Menu System

The Menu System is where you have access to all of Tonic's main functions.
The System Menu has items pertaining to the usage and customisation of Tonic, as well as Help and Version information.
The User Menu has functions that can be performed on the currently selected user in the contact list.
The Status Menu has a list of modes that you can run Tonic in. These modes allow you to inform other users when you are away from your computer, or busy, as well as disconnecting and reconnecting to the Tonic network.
Status

The status menu allows you to let other users know if you are available to receive messages. Please note that messages will still appear on your screen even if you are in Away/DND mode.
The available status options are:
Online: You are at your computer and available to receive messages.
Away: You are temporarily away from your computer.
DND: (Do Not Disturb) You are at your computer but do not want any messages sent to you.
Invisible: You will be able to see who is online, but they will not know you are online.
Offline: You will be disconnected. You won't be able to see who is online, and nobody will be able to see you.
System

The System menu contains the main functions to configure and customize Tonic. The system menu can also be accessed when Tonic has been sent to the System Tray (usually in the bottom right corner of your screen next to the clock) by right-clicking on the Tonic icon (the green ball).
The following options can be selected from the System menu:
Hide/Show: This will send Tonic to the system tray. If it is already in the system tray, the Tonic window will be restored.
Preferences: The preferences window is where you can set your personal information and also change many of Tonic's options.
Manage Connections: The Manage Connections window allows you to bridge your networks together. For example if some of your computers are on the 10.0.0.x network, and others are on 192.168.0.x then you can add the relevant broadcast addresses for the network, in order to allow Tonic to scan them for users.
Send Message to User: Displays a list of all the users in your contact list, and allows you to single left click on a name to send a message. This feature is a convenience so that you do not have to open the Tonic window and double click a name to send them a message.
What's New?: The What's New window allows you to see the recent changes made to Tonic. This window is automatically shown when you install a new version of Tonic. (It will only be displayed once). It will also display the current version of Tonic that you are running.
Help: Displays a windows compiled help file, which has information about the use and functions of Tonic.
Exit: Terminates Tonic. Once you do this, you will no longer be able to send or recieve messages, unless you restart Tonic. (Click the Close button on the Tonic contact list merely hides Tonic to the tray icon. Using Exit completely removes Tonic from the running tasks.
Manage Connections

The Manage Connections window allows you to bridge your networks together.
For example if some of your computers are on the 10.0.0.x network, and others are on 192.168.0.x then you can add the relevant broadcast addresses for the network, in order to allow Tonic to scan them for users.
When you first open the Manage Connections window, you will see that Tonic has already added four addresses. These are the three subnet broadcasts for your current IP address, as well as the global broadcast address(255.255.255.255)
If your IP address is 10.0.0.2, then you will see 10.0.0.255, 10.0.255.255 and 10.255.255.255 to ensure coverage of all the networks within the 10.* range.
To add a new connection, type the address into the four boxes in the 'Create New Connection' box, and Click Add. For example, if your ip was 10.0.0.2, and you wanted to join to the 192.168.0.x range, then you would add 192.168.0.255 into the boxes, and then click Add.
You can remove an address by selecting it in the 'Current Connection List' box, and clicking on the Remove button.
If you find that you made a mistake and cannot for some reason get Tonic working again, try removing all entries from the list, and Tonic will autodetect the settings again on the next restart.
Preferences
The Personal tab will allow you to change your name. This name will be seen by anyone else running Tonic on your network.
The Image tab allows you to choose an icon to represent you. Included are many fun cartoons and well known characters!
The Settings tab allows you to choose how Tonic will behave when certain events happen. You have control over such things as Sounds, Message behaviour and Contact List appearance.
The Message Appearance tab allows you to choose the style you want your messages to be seen in. An example of each style will be shown before you select one. This setting only affects your computer.
Image

My Image - To select an icon, click on it. A selection rectangle will surround the image. You can use the scroll bar below the images to scroll through the entire collection of icons
Search by Filename - You can either use the drop down box, or type the name that you are looking for into the box<
Message Appearance

Left most box - This is a list of all the message appearances available to you. To select one, click on it's name and a preview will be shown in the right box
Right most Box (preview box) - This is where a preview of your chosen Message appearance will be shown. It gives you a general idea on how your message sessions will appear
Personal

My Name - The name that you enter in this box will appear to all users, and will be how they identify you
Clean All History Now - Clears all message History for all users (permanently deleted)
Settings

Sounds:
Play Offline Sound - Will play a sound when a user disconnects from Tonic (offline.wav located in your Tonic\Sounds folder)
Play Online Sound - Will play a sound when a user connects to Tonic (online.wav located in your Tonic\Sounds folder)
Play Message Sound - Will play a sound when a user sends you a message (message.wav located in your Tonic\Sounds folder)
Beep PC Speaker - Will produce a beep from your PC Speaker. The first box is the Frequency to produce and the second box is the length of the Tone. Use the P button to play the tone and preview it.
Auto Away:
After - When you leave your computer inactive for a set amount of time, Tonic will be set to Away, so people know you are not available.
System:
Auto-Start with Windows - Will start Tonic when you start your Windows session. This is useful as you may forget to run Tonic and you might miss important messages!
Show Hide Help on Hide - Display Help when you hit the close button of Tonic. When you hit close on the Tonic window, it is in fact merely minimized to the System Tray.
Contact List:
Small Icons in list - Uses 16x16 icons for your contact list, rather than the default 32x32 icons. You will experience a degredation in quality, however you will aquire more space on the list
Horizontal Arrange - Will determine if your Contact list is arranged Vertically or Horizontally (Scrollbar appears vertically or horizontally for scrolling)
Move Offline users to list end - Will move offline users to the end of your list, instead of leaving them in the middle of your list.
Hide Offline Users - Will hide offline users from your contact list. This makes it difficult to send messages to offline users.
Messages:
Message Windows Always on Top - Will ensure that your message windows are above every other windows, even when you do not have Tonic in focus.
Highlight Username in List on Receive - When you receive a message from a user, this option will highlight the user in your contact list ready for next time you want to reply to them
Font: Tahoma - Allows you to choose the Font used in the Contact list, and in messages
Send Message on Enter - When you are sending a message and you press enter, this option will send the message immediately rather than moving to the next line
Show Message on Receive - When you receive a message it will be immediately shown on your screen
Show Notifier on Receive - When you receive a message a small notification window will be shown on your screen to alert you to the new message.
Close Message on Send - Will close the message window when you send your message
Minimize Message on Send - Will minimize the message window when you send your message
Send Message to User

The Send Message to User window allows you to single click on a user name to send them a message.
This window is most useful when Tonic is hidden and you right click on the Tray icon, and select it from the System Menu. This way you do not have to show Tonic, double click the user you want to send a message to, and then close the Tonic window again.
The window can be resized by dragging the corners to the desired size.
What's New?

The What's New window holds information on your current version of Tonic.
The current Tonic version that you are running is displayed in the title bar (eg, the title bar says 'Update news - 1.0.480')
The text area contains recent changes.
User
The User menu will enable you to perform certain functions related to the user that is currently selected on your contact list.
Send Message: You can type a message to send to the user.
Announcement: An announcement (a message that can't be answered) or a question (a message that can only be answered with Yes or No) will be sent to the user.
View History: You can view all messages sent to and from the current user.
Add: For advanced users/administrators - You can manually enter an IP address that you want added to the contact list.
Rename: You can override the user's preferences by renaming them. This change will only be visible to you.
Delete: Remove the current user from your contact list.
Announcement

Before Sending:
Send Question - A message that can only be answered with Yes or No will be sent to the user. To enter the Question, use the 'Message to display' box
Send Annoucement - A message that cannot be answered will be sent to the user. To enter the message, use the 'Message to display' box
Message to display - Enter either the question or the Announcement in this box and click send.
After Sending the Question:
If you send an announcement, then the window will close. If you send a Question, then when you click Send, a new box entitled 'Results' will appear down the bottom.
You can use the results box to view who said yes and who said no to your question. A tally of all the yes's and no's are added up to the right. If a user closes the window without responding Tonic will inform you of this in the Results window.
Once you are satisfied with the results, click the close button.
Message

The top box - The top box is where the history for the current message session is displayed. When you receive a message it will be displayed in this box.
The bottom box - This box is where you enter your message to send to the current user. The current user's name that you are sending to, is shown in the Title bar of the Message session window
History - Clicking this button will bring up the history for this user. For more about History see the History section in the help
Smiley - This button will show you a list of emotes that are available to you. To use an emote you can click on it, or use the text below it in your message. Once you have selected the emotes you want to use, click the emote button again, and you will be taken back to your history screen.
Send - Will send the message that you have entered in the bottom box, to the user that is in the Title bar.
Close - Will close the current message session with this user. (You can still send more messages and receive messages from them)
Rename

After clicking the Rename menu item, A text box will appear over the selected user's name. Typing a new name will rename them on your contact list (This will only be renamed for you, and not for anyone else). To ensure the new name is used, press Enter. If you want to cancel the rename, press Escape (Esc)
To reset a user to their default name, rename them to nothing, and their name will be reset.
You can also rename a user by selecting them in the list, and pressing F2 on the keyboard.
View History

The top box - The top box is where all the history events are displayed. To view a particlular event, double click it
Filter - Allows you to filter the messages displayed in the top box. Your choices are Both, Incoming, or Outgoing.
Export - Will export the selected messages to the chosen .txt (text) file.
Delete All - Will Delete all incoming and outgoing messages from the current user (displayed in the Title Bar)
Close - Will close the History window.
Your Name and Icon
Both your Name and Icon can be changed in the Preferences section. For more information, see 'Preferences' under 'Getting Started'.
Your Name: The name displayed next to your icon will be the name that is listed on everyone else's contact list. For example, if next to your icon, the name John is displayed, everyone will see you as John on their list.
Your Icon: A large collection of icons have been included with Tonic so that you can add a little personality to your online presence.
Icons can be added to the collection by copying windows icon files to the Images\ directory of Tonic. Once you select the new image in the Tonic Image Tab (under preferences), your image will automatically be sent to everyone else on the network.
Latest Beta Release
| Version | File size | Date Uploaded | Link | Release notes |
| v1.0 build 1032 | 1.44 MB | 14th Oct 2008 | Download now | View Release notes |
Old Beta Releases
| Version | File size | Date Uploaded | Link | Release notes |
| v1.0 build 1031 | 1.44 MB | 06th Oct 2008 | Download now | View Release notes |
| v1.0 build 1030 | 1.52 MB | 14th Aug 2008 | Download now | View Release notes |
| v1.0 build 1029 | 1.52 MB | 28th Jul 2008 | Download now | View Release notes |
| v1.0 build 1028 | 1.52 MB | 29th Apr 2008 | Download now | View Release notes |
| v1.0 build 1027 | 1.44 MB | 03rd Mar 2008 | Download now | View Release notes |
| v1.0 build 1013 | 1.5 MB | 23rd May 2007 | Download now | View Release notes |
| v1.0 build 1012 | 1.5 MB | 22nd May 2007 | Download now | View Release notes |
| v1.0 build 991 | 1.5 MB | 08th Feb 2007 | Download now | View Release notes |
| v1.0 build 963 | 1.5 MB | 27th Jun 2006 | Download now | View Release notes |
| v1.0 build 962 | 1.5 MB | 26th Jun 2006 | Download now | View Release notes |
| v1.0 build 950 | 1.5 MB | 21st Jun 2006 | Download now | View Release notes |
| v1.0 build 931 | 1.5 MB | 20th Jun 2006 | Download now | View Release notes |
| v1.0 build 928 | 1.49 MB | 16th Jun 2006 | Download now | View Release notes |
| v1.0 build 927 | 1.49 MB | 15th Jun 2006 | Download now | View Release notes |
| v1.0 build 926 | 1.49 MB | 14th Jun 2006 | Download now | View Release notes |
| v1.0 build 922 | 1.49 MB | 13th Jun 2006 | Download now | View Release notes |
| v1.0 build 900 | 1.48 MB | 11th Jun 2006 | Download now | View Release notes |
| v1.0 build 896 | 1.41 MB | 30th Mar 2006 | Download now | View Release notes |
| v1.0 build 894 | 1.41 MB | 30th Mar 2006 | Download now | View Release notes |
| v1.0 build 892 | 1.41 MB | 30th Mar 2006 | Download now | View Release notes |
| v1.0 build 891 | 1.41 MB | 29th Mar 2006 | Download now | View Release notes |
| v1.0 build 890 | 1.41 MB | 29th Mar 2006 | Download now | View Release notes |
| v1.0 build 880 | 1.41 MB | 28th Mar 2006 | Download now | View Release notes |
| v1.0 build 848 | 1.32 MB | 27th Mar 2006 | Download now | View Release notes |
| v1.0 build 846 | 1.31 MB | 26th Mar 2006 | Download now | View Release notes |
| v1.0 build 784 | 1.24 MB | 09th Mar 2006 | Download now | View Release notes |
| v1.0 build 772 | 1.23 MB | 19th Dec 2005 | Download now | View Release notes |
| v1.0 build 763 | 1.23 MB | 16th Dec 2005 | Download now | View Release notes |
| v1.0 build 740 | 1.23 MB | 15th Dec 2005 | Download now | View Release notes |
| v1.0 build 719 | 1.23 MB | 06th Nov 2005 | Download now | View Release notes |
| v1.0 build 703 | 1.22 MB | 22nd Apr 2005 | Download now | None available |
| v1.0 build 683 | 1.22 MB | 21st Mar 2005 | Download now | None available |
| v1.0 build 680 | 1.22 MB | 04th Mar 2005 | Download now | None available |
| v1.0 build 599 | 1.2 MB | 14th Jan 2005 | Download now | None available |
| v1.0 build 500 | 1.19 MB | 11th Oct 2004 | Download now | None available |


You can follow r2 Studios on the following social media sites: